
Welcome to The Cherry On Top.
We've got a fantastic recycled gift project idea for you with a super handy tutorial that you could use for a variety of projects. We love our flexible projects. Scroll through the images to see our up cycled greeting card box, gift idea and get your daily freebie from our Sleigh Bells Ring kit.
Here's a look at the finished project. I used all things that I already had around the house with the exception of what's in the box. Keep reading to find out more.
This project may seem kind of time consuming, but it went together very quickly. Read how we kept this project to just over an hour for BOTH boxes, from start to finish.

I gathered the boys together to do their class room Christmas cards. Some of them were contained in a cubed, clear, plastic box that was very rigid. The wheels were immediately turning. I just had a feeling that this box could be something special.
Each square of the box measured just over 4 inches. At first I thought I'd scrap up the recipient in a different layout for each box. After a bit more consideration, I thought it would be very time consuming. That was 6 squares per box and I needed 2.
Then, "BING!" It hit me. I'll use already existing layouts that I have and just swap out the photos. Thank goodness I save my layouts as a tif, in layers so this was even possible. Keeping the layers or at the very least, layering your photo spot might not be a bad idea for future usage.
Here is an image of one of my Christmasy layouts with my boys. You can see the layers to the right. I've high lighted the photo. Look down at my photo gallery on the bottom. The last image on the right, is my template. Create a new file, use the custom setting and type in exactly the measurements you need. I used 10,4 cm x 10,4 cm. I used this same template over an over again rather than make a new document each time.

All I had to do was plop in my lovely niece. The tree and Santa elements covered up my precious pooch, so I clicked on both of those items and made them smaller. You can see them high lighted on my layers menu. Then just "save as" and name each slide something different. I then deleted the layout and reused the template.

Again, I got rid of my original photo and put the recipient of this nifty gifty in the photo spot. Then took out the photo in the other photo spot and put in a seasonal greeting. I also had to shrink the cluster slightly. The year I didn't have to change because it was the same. Yay! "Save As" a jpg, again and delete the image from your template and start on your next one.

If you are an avid Cherry fan, than you've seen or even downloaded our Christmas poster using our free kit, Sleigh Bells Ring. I took that and put it on my 4x4 template, shrank it, then backed it up with a couple of our papers. TIP: If you want, you could put in this black outline around your template. To do that, copy your background, shrink it just slightly, then use the outline function. I have it high lighted in this image. I thought it would make it easier for cutting and it really helped.

Here is another of our freebies. This is our greeting card, cropped, fitted and again, layered up on one of our papers from the Sleigh Bells Ring kit.

I gave each recipient a different image for each square, but you could always repeat some to save time.
In this image you can see my layer for the outline and how I saved the image for printing.

Something you should absolutely NOT forget, is how you save your original tif, psd or original, layered layout. When it asks you if you want to save it, you choose, "Don't Save". This way you have your original layout still in tact and your new one should be saved under something completely different and in jpeg format. This will save space on your drive.


Now, we are finished with the digital portion of our project. Let's get our fingers dirty!
Here is the box that I used with an original inhabitant. Hehehe... Peel off any stickers and clean the box.

Print out all of your squares to cover the ones you want covered. I didn't bother covering the bottom.

This is what I put in one of the boxes. My niece is 12. Some lotion, shower gel, a very inexpensive yet trendy bracelet, Mentos and 10 Euros. I took the lotion and gel out of the box it came in and retied the bow to the gel.


The only printed square I glued was the one for on top. I glued it to the inside and it came out perfect. No sign of glue whatsoever.

I simply slid in each mini layout. Once the goodies are in your box, they hold your mini's in place. You could always use tissue paper to fill your box if there is too much space and your layouts move around. You could also glue them like we did for the lid.

Take a peek. Pretty cool, eh?


These were the supplies I used:
clear box
glue stick
scissors
ribbon
your mini layouts
gifts/money/gift certificate (rolled or folded)

See, just slide your image right in place. I used standard printing paper, but of course, you could use a heavier weight.

Almost finished.

As you can see, the tops is bowing a bit because the shower gel is slightly too large for the box, but don't worry!

Once you add your bow/ribbon it's fine.
There are a couple of different ways to finish your ribbon's ends. Cut straight across with a very sharp scissors so you don't have fraying, at an angle or with points, as shown here.

Make an inexpensive gift totally awesome by adding personal touches, with your photos and by adding some spectacular ribbon or bows. I picked up these at the Aldi in a pack of 4 for 2,99 Euros a couple of days ago.
The one with the stars is a standard bow with cut in points at the tip. The other is a standard bow, then another bow tied to the top of that. Like when you have shoe laces that are too long. You just make another bow. The light weight wire in the ribbon allows you to move and manipulate to get the perfect shape. I use this kind of ribbon a lot more than the kind without.

It's still missing something, don't you think? Hmmm...

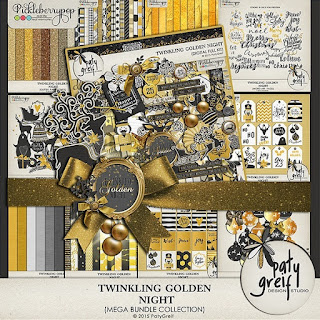
How about some tags?! I used Paty Greif's brand spanking new kit Twinkling Golden Night and The Cherry's very own free, tag templates that you can get here.

Paty already has some lovely tags ready for you, if you want to save more time.

Here's a glimpse of her entire collection. Choose any of the two images to get to her shop.
This freebie is no longer available. Stay tuned for more great free stuff.
We've got so much free stuff on our blog. Take a look to the right and see some of the latest topics or just scroll through them all to see what you've missed.
Thank you so much for making The Cherry a part of your day.
Holiday holidays!
No comments:
Post a Comment